Friday, April 9, 2021

Skirmish Battle Report - Iden vs Bossk


Unable to secure a sixth player for the Easter league a bye round (average score of all players rounded up) was enforced for each player. Currently the scores were as follows:

James - 3 points
Chrace - 3 points
Aeson - 1 point
Landon - 1 point
Alex - 2 points 

This was round 2 of a 5 round series and Chrace opted to take the bye round for this round putting Landon vs Alex. Landon opted to change lists and take a score hit (-1 point) not content with his last performance even though I couldn't talk him out of it.

Lists:

Landon returned to Iden Versio who he has got a bit of experience with:

493/800

5 Activations

Iden Versio (Offensive Push, Hunter, Iden's TL-50 Repeater)

Snowtroopers (Gideon Hask, Imperial Comms Technician, HQ Uplink)

Snowtroopers (Snowtrooper)

2x Imperial Special Forces (T-21 Special Forces Trooper, Hunter, Offensive Push)

Ambush•, Pulse Scan•, Push••, Concussive Blast••, Assault•••, Tactical Strike•••, Standing Orders••••


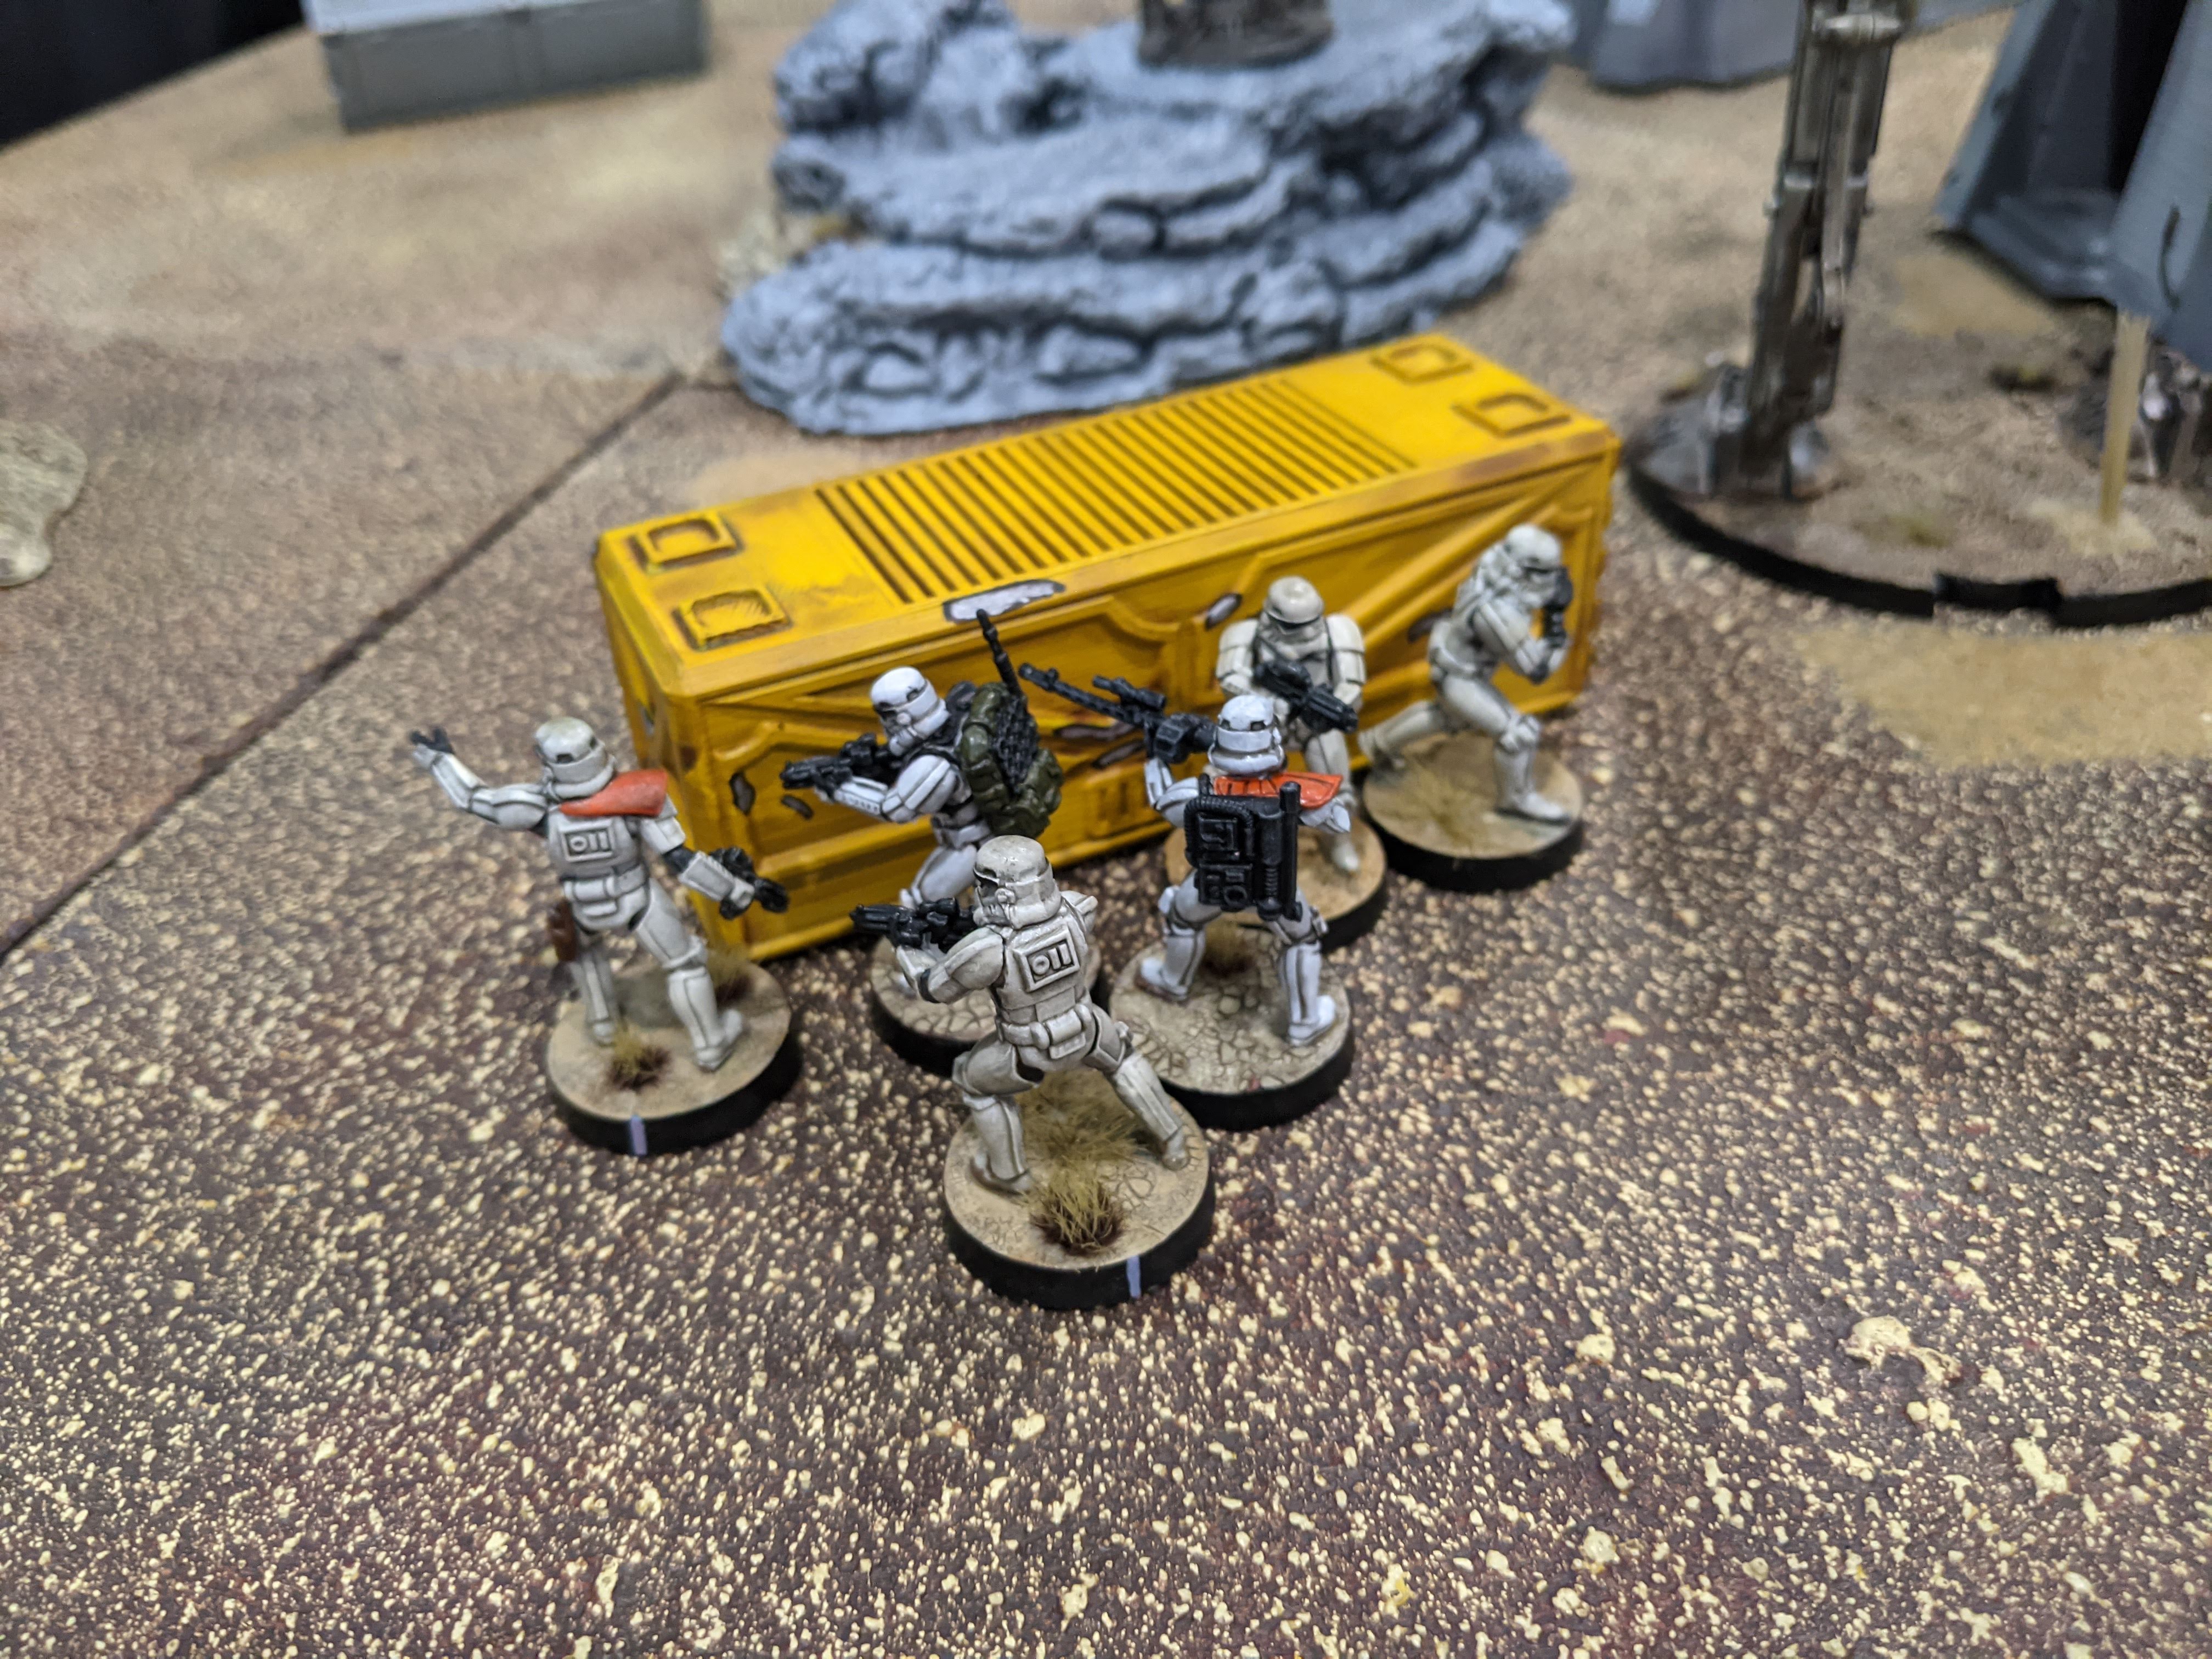
Alex had a single game of Legion upon release to learn the rules with me years ago so it would be another introduction game for him.

498/500

5 Activations

Imperial Officer (Electrobinoculars)

Bossk (Hunter)

2x Shoretroopers (T-21B Trooper)

TX-225 GAVw Occupier Combat Assault Tank (First Sergeant Arbmab)

Ambush•, Merciless Munitions•, Push••, Reptilian Rampage••, Coordinated Fire•••, Lying in Wait•••, Standing Orders••••

Objectives:


Deployment:


Imperial Special Forces infiltrate further afield.


Turn 1 - Ambush (1 pip) vs Push (2 pips)

HQ Uplink popped onto Snowtroopers (Gideon's unit), Gideon coordinates. Ambush token is placed on infiltrating special forces. Shoretroopers and Tank take tokens.

ISF take a dodge and standby token. Shoretroopers move out to flank and take a standby token. 

Tank rolls up and shoots onto the ISF for suppression only (son forgot about standby). Second ISF unit triggers standby and opens up on tank causing a single wound.

Iden pushes forward for no damage onto the tank. Snowtroopers no damage onto tank. 

Bossk drops an ISF soldier from range with his mortar rifle. Shores match Bossk's damage.


Turn 2 - Tactical Strike (3 pip) vs Ambush (1 pip)

The tank with a faceup order token rolls up dropping a pair of snowtroopers. ISF push up with aims and takes out 3 shoretroopers. Officer repositions and gives out aim tokens to Bossk and Shoretroopers. ISF rally, shoot onto Bossk for 3 wounds.

Shoretroopers delete a pair of ISF then Iden sneaks up dropping Bossk. Second unit of Shores move up and wipe out the Snowtroopers leaving Gideon alone. Rest of the fire goes onto tank for no damage.

Turn 3 - Concussive Blast (2 pip) vs Standing Orders (4 pip)

Iden shoots onto the tank for no damage. Tank moves up and pivots shooting onto the Snowtroopers killing 3. Gideon activates and double moves triggering steady. Although no damage goes onto the Shoretroopers a single suppression token. Shoretroopers kill Gideon. Full strength ISF unit wipes out the remaining Shoretrooper unit.


Turn 4 - Assault (3 pip) vs Coordinated Fire (3 pip)

Shoretroopers fail to take any bodies from the full strength ISF passing their aim token to the tank. Iden drops the Imperial Officer. Tank kills the remaining Snowtroopers.


Turn 5 - Push vs Standing Orders

Lone ISF pushes into enemy deployment zone. Shoretroopers put 5 wounds onto Iden. She moves off into safety. Tank drops a single ISF however they move off into the enemy deployment zone for the win.

Result - Imperial victory

Conclusion

Losing Bossk was a devastating blow to Alex's forces and hard to recover back from. Despite having the tank it wasn't able to put out the damage it needed to in order to delete/cripple units. Landon played the objective very well and snuck into the enemy deployment zone for the win. The league score is now as follows:

James - 3 points (1W/0L/0D)
Chrace - 3 points (1W/0L/0D)
Aeson - 1 point (1W/0L/0D)
Landon - 3 point (1W/1L/0D)
Alex - 3 points (0W/1L/0D) 

Up next is James running Han Solo versus Aeson running a Veers and AT-ST list.


Thursday, April 1, 2021

Skirmish Battle Report - Rex vs Veers


Welcome to another battle report in the Easter league. The prize for first place had been secured and with interest certainly peaked, the competitive feeling within the house certainly jumped with even the daughter (who has never played Legion) expressed interest in joining.

The basic rules for the league was fairly simple with the scores being as follows:

Win - 3 points
Draw - 2 points
Loss - 1 point

In terms of how many rounds we were going to play this will be decided once a final tally of players has been confirmed.

The second game to report on is between my second and third sons taking the Galactic Republic led by Captain Rex faced off against General Veers of the Empire.

Galactic Republic - Chrace

498/500
5 Activations

Clone Captain Rex (Aggressive Tactics, Hunter, JT-12 Jetpacks)
2x Phase I Clone Troopers (Z-6 Phase I Trooper, Phase I Clone Trooper)
Arc Troopers (Strike Team) (Echo, Hunter)
Arc Troopers (Fives, Hunter, Comms Jammer, JT-12 Jetpacks, Targeting Scopes)

Ambush•, Call Me Captain•, Push••, Take That, Clankers!••, Assault•••, We're Not Programmed•••, Standing Orders••••


Empire - Aeson

495/500
5 Activations

General Veers (Electrobinoculars)
2x Stormtroopers (RT-97C Stormtrooper, Stormtrooper Specialist)
Scout Troopers (Strike Team) (DLT-19x Sniper)
AT-ST (Imperial Hammers Elite Armor Pilot, 88 Twin Light Blaster Cannon, Linked Targeting Array)

Ambush•, Maximum Firepower•, Pinned Down••, Evasive Maneuvers••, Coordinated Fire•••, Imperial Discipline•••, Standing Orders••••

Objectives


Deployment


Turn 1

Assault (3 pip) vs Standing Orders (4 pip)

Aeson is only a 10 year old player so my advice for him was simply. Ensure your AT-ST has an order token every turn and focus on a single unit before moving onto the next. He placed his faceup order token onto the AT-ST and went to work shuffling most units forward into mutually supporting positions. The Clones also did the same thing setting up for next round shots.


Turn 2

We're Not Programmed (3) vs Ambush (1)

Once again the AT-ST has an order token for use in the later turn. The Clones have complete activation control with only the ARC troopers going into the draw pile.

The Stormtroopers move into the open and take a dodge action and pop the Stormtrooper specialist for a surge token. Echo moves into a sniping position managing to drop one of the opposing Strike team members. Veers hands out aim actions before the ARC troopers take a double move to get into a next turn flanking position.

The second unit of Stormtroopers open fire onto nearby clones for a single suppression token only before they pour fire into the AT-ST resulting in a single wound. The second unit of clones mirrors the first with another wound and in reply the Imperial war machine kills 3 clones.


Turn 3 

Take That Clankers! (3 pip) vs Coordinated Fire (3 pip)

Rex gets to work immediately putting 2 wounds onto the AT-ST. Seeing an opportunity the Stormtroopers rush into position pouring accurate fire into Rex stripping him down to a single wound! The ARC troopers continue to assault the walker for nil damage.

The second unit of Stormtroopers face the now exposed ARC troopers and reactionary fire drops 2 of their number. Clones fire onto the AT-ST determined to crack the machine but the armour proves too thick. The AT-ST splits fire in response onto the Clones and Captain Rex netting only suppression tokens.

The Strike team blanks out attacking Rex before the Phase 1's split fire of their own taking out the remaining sniper (+1 VP) and scoring damage onto the AT-ST.

General Veers drops a single ARC trooper.


Turn 4

Ambush (1 pip) vs Maximum Firepower (1 pip)

GAR win the roll off for initiative. Rex moves behind the building for cover and takes a dodge token. In a stroke of genius Veers double moves away from the ARC troopers putting them at range 4 and kills another with an aerial barrage.

The Phase 1's rally before aiming and taking another point of damage onto the AT-ST and handing it a disabled token (Requires 2 actions to move). In reply the AT-ST drops 2 Clones after 6 hits and help from nearby Rex with a dodge token. Echo targets the war machine but can't find the chink in its armour whilst the Stormtroopers unleash fire power into the second unit of Phase 1's destroying the unit (+1 VP).

Finally Fives targets the rear of the AT-ST but once again can't find any soft spots.

GAR - 1 VP
Empire - 1 VP


Turn 5

Call Me Captain (1 pip) vs Evasive Maneuvers (2 pip)

The final pivotal turn and the Phase 1's manage to put the nail in the coffin and destroy the AT-ST (+2 VP) which meant Aeson needed to destroy 2 units to tie the game or kill Captain Rex who was safely hidden away.

The Stormtroopers unload onto Fives who falls quickly (+1 VP) however the rest of the Clone army withdraw into cover and out of line of sight. The final unit of Stormtroopers have a shot onto Echo however the dice without the aid of any aim tokens abandon the Empire resulting in no damage.

Final Score

GAR - 3 Victory Points
Empire - 2 Victory Points

Result - GAR Victory

The Easter league scores currently stand as follows:

James (Rebels) - 3 points (1W/0D/0L) 
Chrace (GAR) - 3 points (1W/0D/0L) 
Aeson (Empire) - 1 point (0W/0D/1L) 
Landon (Empire) - 1 point (0W/0D/1L) 

Wednesday, March 31, 2021

Skirmish Battle Report - Solo vs Krennic


Welcome to another Star Wars Legion battle report this time using the Skirmish rules.

With a recent COVID-19 lockdown in Brisbane which meant my kids were at home and the Easter holidays near, I challenged them all to put some lists together to get ready for a league we'd run over the holiday period.

My eldest son and I played first. He's a bit of a fan of Death Troopers and immediately got to work putting together a force of them:


495/500

6 Activations

Director Orson Krennic (Aggressive Tactics, Strict Orders)

Boba Fett

2x Stormtroopers

Scout Troopers (Strike Team) (DLT-19x Sniper)

Imperial Death Troopers (DLT-19D Trooper, Hunter, E-11D)

Ambush•, Voracious Ambition•, Push••, Deploy the Garrison••, Assault•••, Annihilation Looms•••, Standing Orders••••


I normally spend all my time running Empire so I'd figured I'd better start using some of the other painted models in the games room and put together a force with Han Solo at the helm:


495/500

7 Activations

Han Solo (Duck and Cover)

Chewbacca (Tenacity)

Rebel Troopers

Mark II Medium Blaster Trooper

Rebel Veterans (CM-O93 Trooper)

Rebel Commandos (Strike Team) (Proton Charge Saboteur)

Tauntaun Riders (Tenacity)

Ambush•, Sorry About the Mess•, Push••, Reckless Diversion••, Covering Fire•••, Change of Plans•••, Standing Orders••••

I won the initiative roll off and we ended up with the following cards:


Deployment:


Objective marker just underneath the archway


Turn 1 - Standing Orders vs Standing Orders

Most units push forward slightly with the Dawn condition card meaning not too many shots got off this turn. However the Stormtroopers push up and take a Standby action preventing me from using my Tauntaun the way I intended (to eliminate the Snipers on the flank).

I pushed my Commandos up and dropped a mine to hurt some Imperial folk right before Boba swooped in and deleted them. Mental note to wait patiently with them next time....

In response Han pushes forward and puts a wound onto Boba and the Death Troopers seeing Han out in the open blast into him. I'm lucky though and through Duck & Cover, Uncanny Luck and Guardian, Han is untouched and Chewie takes a single wound. The Walking Carpet then unleashes with his Bowcaster dropping 3 of the Death Troopers. The Tauns move closer to the Death Troopers to finish them off however all the rounds bounce off their armour.


Turn 2 - Sorry About the Mess vs Voracious Ambition.

The Rebel Veterans aim and take shot attempting to wipe out the remaining Death Troopers but it is not meant to be. The Death Troopers put more wounds onto the Wookie triggering the Charge keyword. I don't waste anytime and throw Chewie into Boba Fett before he can escape managing 2 more wounds.

It is the Tauns who eventually score the kill after a charge but not before Boba Fett puts another 2 wounds back onto Chewbacca. The Medium Blaster moves to look over the objective and takes a standby action which would later trigger from Stormtrooper movement, producing only a suppression token.

Han pushes forward and kills the Sniper team and dropping a pair of Stormtroopers.

Krennic pushes forward to contest any victory points from the objective meaning no score this round.


Turn 3 - Reckless Diversion vs Annihilation Looms

Han takes an order token whilst the Rebel Veterans take one chaining an order onto the Blaster. With the Blaster being in a position and visible to most of the units it would force them to attack it if able.

Han goes first kills the final pair of Stormtroopers removing an activation and then Gunslinging another pair of casualties from the remaining Stormtrooper unit. I then move him towards the objective. At this stage my son is only left with Krennic, two Stormtroopers and two Death Troopers. He makes his choice to concede after we talk about the game in detail in terms of what he could have done to play better.


Result - Rebel Victory

Conclusion

It was a welcome change to play the Rebels for me and I did enjoy the list. It had the fast hitting elements of the Tauntaun Riders and enough black dice to do some damage at distance. I really did enjoy Han's pistol and consistent firepower although if Chewbacca isn't around to use Guardian I'm not sure he'll survive late game. I really need to use my Commandos move wisely and I didn't even use Scout 2 which may have had an impact.

My son rushed Boba Fett in rather than sit back with him and deal consistent damage over time. I think he got a bit fixated on the objective and rather than being patient he swarmed it to prevent me gaining victory points. We discussed him using his Sniper team to better effect alongside with Boba Fett and each turn they'd be really putting the hurt on a unit consistently.

I'll put the next game up between my son's in the future.

Thanks for reading.

- James


Wednesday, February 3, 2021

Legion - Army List Review - Vaderbacks


Over the course of the silly season I was lucky enough to have a fair few games with the family members in the house who enjoy legion as much as I do.

Although we're not playing ultra competitive lists at all, the kids sure do like to make every attempt to knock me down when they have a chance. Darth Vader has always been a fan favourite for me and despite being a 'non-meta' choice, this only fuels me to try and have fun with him in lists I try.

This is the list I've been playing around with over the last 6 weeks and it has been a lot of fun.

Darth Vader (175 + 25 = 200)

--Force Barrier (10), Force Push (10), Saber Throw (5)

Although very slow, once Vader picks up momentum he hits like a truck. Combined with Force Push allows him to dictate most of his battles but also allows him to remain in combat which is generally a safe place for him. Force Barrier has quickly become a new favourite of mine mitigating damage onto the Dewbacks and any other targets of opportunity.

Allowing myself not to forget about Force Barrier.


Imperial Officer (45 + 5 = 50)

--Strict Orders (5)

A cheap activation and having Strict Orders allows for greater suppression control. The beauty of this list as well is there isn't any courage 1 values in the force meaning an opponent really needs to work hard to remove actions from units.

2 x Stormtroopers (44 + 39 = 83)

--DLT-19 Stormtrooper (22), Imperial Officer Upgrade (17)

Stock standard Stormtroopers with the range 4 DLT. The Officer upgrade allows for two actions more often.

Snowtroopers (44 + 38 = 82)

--Gideon Hask (38)

Gideon Hask is a wonderful addition to a unit of Snowtroopers. Steady allows for his two red dice to punch through enemy units as well as the additional pip of courage. His coordinate rule is also handy when it comes up (and/or when I remember it...).

Imperial Royal Guards (75 + 6 = 81)

--Tenacity (4), Environmental Gear (2)

Commonly known as Vader's ablative wounds.


Vaders/Dewbacks extra wound pile. These guys are generally soaking wounds but also aren't a slouch when charging into combat. Last game they managed to put 5 wounds into Count Dooku with their pistols at range 2. Good times! 

Scout Troopers (Strike Team) (20 + 28 = 48)

--DLT-19x Sniper (28)

Some much needed long range support. They're also good at capturing an objective late game if the need comes up. Also not a bad choice for Force Barrier in the opening round if something is targeting them.

2 x Dewback Rider (75 + 9 = 84)


--Tenacity (4), Comms Jammer (5)

One of my favourite models/units in the entire game of Legion. I really enjoy running these although my opponents hate them and they generally don't make it to the end of the game. They're certainly blaster magnets for warranted reason. Once they get into combat they can essentially tarpit the unit until they've finished with them provided they're not a force wielder. I'd never used Comms Jammer until this list and the disruption is causes is amazing. Using a turn 2-3 'New Ways to Motivate Them' to ensure they get into combat deep into the enemy lines guarantees some annoying situations for the opponent. I do miss having no ranged armament on them however.

Keeping a heavily suppressed unit close to Vader ensures they won't panic.


They're also great to provide some mobile light cover for Vader if needed but generally I've found opponents will just focus fire to bring them down anyway if they have a shot.

A cheeky play is to displace enemy troops on the same round as Master of Evil is played for maximum amount of suppression and a greater chance of enemy panicked units.

Commands:

Vaders Might (1), Implacable (1), New Ways to Motivate Them (2), Push (2), Assault (3), Master of Evil (3), Standing Orders (4)

Vaders Might - is a great way to move a Dewback from a vulnerable position into a better one outside of the obvious repositioning benefits of enemy units.

Implacable - Always a mid to late game play in order to last/first something with Vader and get double attacks/force barrier/force push onto something. I've often struggled with over committing Vader in my early Legion games and playing it a bit safer allows for better opportunities to use this card.

New Ways to Motivate Them - This is a very potent combination with spurring Dewbacks. They can move just shy of range 3 which is difficult for an opponent to plan around and can easily catch someone off guard. The key is popping it just at the right time to ensure maximum results. Sometimes the better option is to charge the enemy and hope you're attacks don't wipe them out by leaving them safe from return fire. Royal Guard are also a good candidate for this allowing them a bit more flexibility and to trigger Tenacity.

Master of Evil - The go to card once Vader is in the thick of combat. 3 suppression tokens is generally enough to ensure enemy units are only performing one action which can really swing a turn.

Deployments: Major Offensive, Battle Lines, Advanced Positions, Hemmed In
Objectives: Sabotage the Moisture Vaporators, Key Positions, Intercept the Transmissions, Recover the Supplies
Conditions: Minefield, Limited Visibility, Hostile Environment, Supply Drop

Thanks for reading and I hope you'll give it a try at some stage.

James

Wednesday, September 30, 2020

Review: Davinci Paintbrushes


I can't remember the last time I shelled out hard earned cash for decent brushes. Normally, I'd buy the cheaper option and replace it a few times per year rather than fork out extra dollars for a 'quality' brush.

This time, I did a bit of research and asked some questions from my regular supplier and decided to invest some money into a set of Davinci maestro brushes. At $20+ per brush, I was certainly expecting the quality to be leaps and bounds ahead of the cheap nasty stuff I normally get. I even invested in some brush soap which is a product I've never used before in order to increase the life of my newly acquired brushes.

I wasn't even sure I wanted to post a review on these but the more I used them it gave me more insight into the quality of the brush (at least my batch) and I had to share. I purchased 3 brushes in the following sizes - 1, 0 and a 000.

Overall it hasn't been a positive experience. Within the first week of using the size 1 brush, the bristles were already beginning to split despite religiously using the brush soap after each painting session. Maybe I just got the bad batch perhaps? I was willing to let that one go. However much to my disappointment last night whilst using the size 000, I noticed the same thing happening. A rogue bristle was sticking out at an odd angle.

So the general rant of this post and recommendation is to stay away from Davinci brushes.