In regards to the format the battle report is presented, this will be an ongoing process to balance what works easiest for me, presents the most digestible information, and provides clear indications as to what is going on.
Lists
I ran a triple speeder bike led by Veers:
General Veers (Aggressive Tactics, Electrobinoculars)
Shoretroopers (T-21B Trooper, Shoretrooper, Targeting Scopes)
Shoretroopers (T-21B Trooper, Shoretrooper, Targeting Scopes)
DF-90 Mortar Trooper
DF-90 Mortar Trooper
Stormtroopers (DLT-19 Stormtrooper)
Stormtroopers (DLT-19 Stormtrooper)
Scout Troopers (Strike Team) (Sonic Charge Saboteur)
74-Z Speeder Bikes (HQ Uplink)
74-Z Speeder Bikes (Long-Range Comlink)
74-Z Speeder Bikes (Long-Range Comlink)
Commands:
Maximum Firepower (1), Ambush (1), Evasive Maneuvers (2), Pinned Down (2), Imperial Discipline (3), Assault (3), Standing Orders (4)
11 activations with a solid line of firepower and some mobility with the bikes.
Chrace was running the following with the newly painted Cassian Andor and K2SO.
Cassian Andor (Hunter, Tenacity, Recon Intel, A280-CFE Pistol Config)
Cassian Andor(Loadout) (Offensive Push, Overwatch, A280-CFE Sniper Config)
K-2SO (HQ Uplink, Jyns SE-14 Blaster)
Rebel Troopers (Rebel Trooper, Fragmentation Grenades)
Rebel Troopers (Rebel Trooper, Fragmentation Grenades)
Rebel Troopers (Rebel Trooper, Fragmentation Grenades)
AT-RT (HQ Uplink, AT-RT Laser Cannon)
AT-RT (HQ Uplink, AT-RT Laser Cannon)
Tauntaun Riders (Tenacity, HQ Uplink)
T-47 Airspeeder (Ryder Azadi, HQ Uplink)
Commands:
Sabotaged Communications (1), Crack Shot (1), Turning the Tide (2), Last Stand (2), Volunteer Mission (3), Sacrifice (3), Standing Orders (4)
He certainly had his fair share of hard hitting elements, and I was certainly worried about the Tauntaun riders and the amount of punishment they could absorb. Chrace had initiative and he dealt the cards and we were left with this.
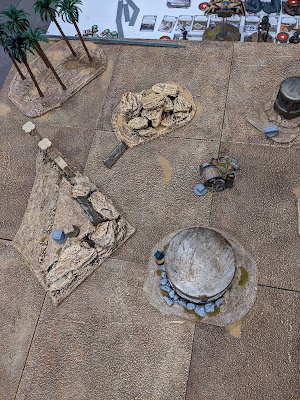
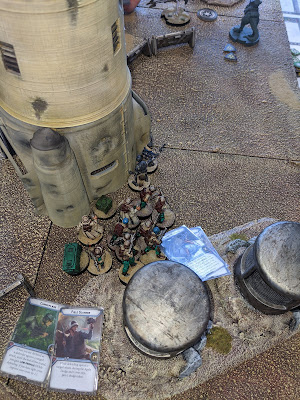
The supplies went down close to each others lines and the supply crates with the juicy loot in them were pretty close to these as well.
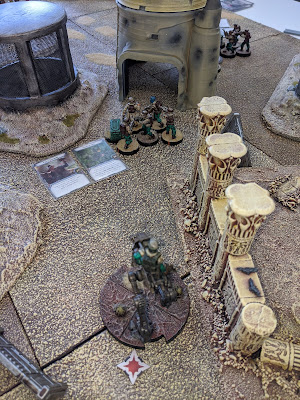
I started putting down Stormtroopers to capture my two supply crates early on in the piece however Chrace had three within easy grasp of his units. I figured that I would shoot some speeder bikes towards his lines to eliminate his trooper elements however I simply didn't pay attention to the deployment card and completely botched it up.
Turn 1
Maximum Firepower (1) vs Sabotaged Communications (1)
Very quick turn with the Imperial lines moving up to capture loot and supply crates. Stormtroopers put some damage onto the AT-RT thanks to the range 4 DLT. Veers kills a single Rebel Trooper with his command card attack.
The Rebels pretty much do the same, grabbing supply cards and objective crates.
Turn 2
Evasive Maneuvers (2) vs Volunteer Mission (3)
The Shoretroopers collected an Arc Welder and put two wounds onto Tauntauns.
AT-RT shoots at nearest Speeder Bikes for no damage after spending dodge token and Cover 1.
Speeders take dodge token and attack the Tauns for no damage.
Tauns move and target single speeder bike doing a damage token.
Speeder bikes move up and aim putting 1 damage onto Tauns.
K2SO calculates odd and puts one damage onto speeders after they spend both dodge tokens.
Stormtroopers on the far flank activate, moving forward to get into range 3 of the activated AT-RT. DLT gets a wound through which disables the weapon.
AT-RT puts a second wound on the speeder bike unit in front of the Tauns.
Stormtroopers grab a rangefinder from the box and move forwards.
Rebel Troopers in the far corner grab precision scopes from the supplies and claim the objective before moving off.
Shoretroopers grab an Arc Welder from the loot before putting another wound onto the AT-RT.
Cassian activates recovering, allowing the rifle to go to the pistol config. He put 2 wounds onto the closest speeder bikes taking off a model.
Mortar wounds the Tauns taking off a model.
Rebel Troopers move into range and take another wound off the lone Speeder bike.
Veers runs up staying out of line of sight.
Airspeeder aims and does 4 damage on the speeder bikes.
Scouts claim box.
Last speeder bike destroys the damaged AT-RT.
Turn 3
Imperial Discipline (3) vs Crack Shot (1)
Veers, both units of Shoretroopers and a mortar get face up order tokens.
Taun fails to rally but uses single action to move then shoots Veers for suppression only.
Shores aim and take out Cassian spending two aims to get 8 hit results.
K2SO aims onto Speeder bike and takes it out.
Random draw last speeder bike, puts a single wound onto AT-RT.
AT-RT fails to damage the speeder bike.
Mortar wounds Taun planting another two suppression tokens onto the beast.
Rebel Troops put single wound onto Speeder bike.
Veers bolts into light cover (trees).
Rebel troopers destroy last speeder bike with precision scopes.
Stormtroopers double march to close some much needed distance between them and crates.
Rebel troopers fire into Shoretroopers for suppression only.
Scouts double move.
Airspeeder sharp turns and puts 2 damage into Veers.
Shoretroopers loot precision scopes and unload into Taun killing it.
Turn 4
Assault (3) vs Turning the Tide (2)
Facing a losing battle I was trying to figure out a way to destroy a unit of Rebel troopers in order to play for a draw but it wasn't looking promising. I put down order tokens onto the Shoretroopers and gained some aim tokens for them.
The Airspeeder reposition for some future turn hits.
Veers rallies, and removed a suppression token from the Shoretroopers thanks to Inspire. Spotter comes into action before firing and dropping a Rebel trooper.
AT-RT shoots onto Veers for suppression only.
Shoretroopers killed 2 Rebel troopers.
Rebel troopers run into the safety of the back lines with their box.
Shoretroopers move up and take out all except one Rebel Trooper who is out of line of sight.
Rebel trooper rallies and withdraws.
Stormtroopers move along flank and chip a wound onto AT-RT.
K2SO double moves back.
Scouts move behind building.
Rebel Troopers move to take cover near rocky outcrop.
Stormtroopers and remaining two mortars put 4 damage in total into Airspeeder.
Turn 5
Ambush (1) vs Standing Orders (4)
Shoretroopers put another damage onto the Airspeeder causing a 'Damaged' result. (Purely going for the morale victory here hunting the Airspeeder!)
Rebel Trooper runs out of line of sight.
Scouts sit tight.
Rebel Troopers get into cover next to other unit and dodge.
Stormtroopers destroy the Airspeeder.
Rebel Troopers move towards blob in the corner of the table.
Stormtroopers kill a single model from above unit hiding in the corner but it simply wasn't going to be enough.
K2SO moves to blob.
Shoretroopers push up.
Turn 6
Pinned down (2) vs Sacrifice (3)
Rebels camp out in the corner whilst the Stormtroopers manage to kill a trooper. Shoretroopers clamber for a better fire position but are unable to get the result required and I concede defeat.
Final result:
Imperials - 2 VP
Rebels - 3 VP
Rebel Victory
Conclusion:
Finally a game to report on. I lost this game in deployment simply by not paying attention to the deployment card. I had the fast elements in my army in order to disrupt my opponents plans but failed to execute. Live and learn!
I had a bit of a debrief with my son as well and he could have castled his forces earlier to prevent losses and not expose Cassian Andor who was lost in vain. He could have placed his AT-RT's in more central positions to punish any bikes screaming up supported by the Airspeeder.
 |
|
Alternative AT-RT positioning as well as where I should have started most of my forces in order to pressure the Rebels earlier.
It only struck me at turn 5 that if I got the Shoretroopers onto the terrain they'd have line of sight to the troopers hiding behind the terrain. This is something I didn't even see until it was too late. Either way, as frustrating as it is to see more mistakes in my mind than good plays, it was a great game and I continue to learn more about it as time goes on. Also, as you could imagine it was a great morale boost for my son to smash his old man and the Rebels to score the day!
Thanks for reading. If you've made it this far I appreciate it as I've used a number of blog tools over the past but as it turns out I think Blogger is a giant piece of garbage in terms of trying to achieve some simple formatting etc.


No comments:
Post a Comment